This year I had the pleasure of having the time to make many of the gifts I gave to family for Christmas. Some of these projects started a while ago and some were last minute, but what they all had in common was that I made them.
Custom Outlet for Bulb
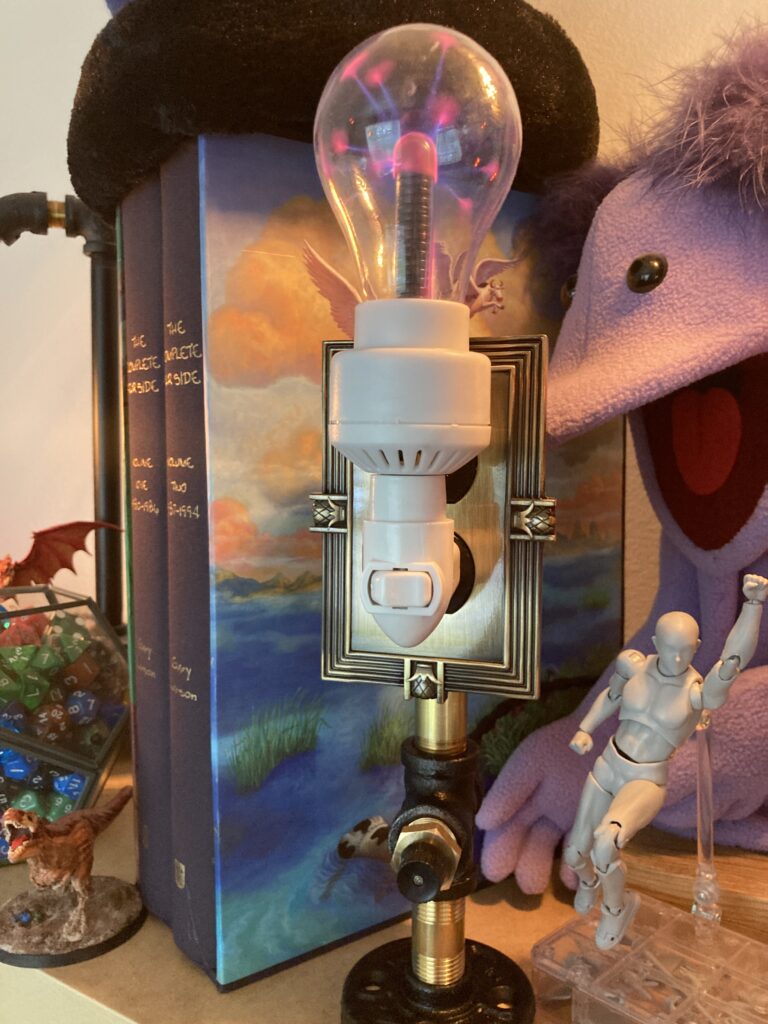
The first was really for me and wasn’t even really for Christmas, but I’ll share it anyway. Years ago, a good friend named Cyrus gave these awesome Van De Graaff generator lightbulbs. Unfortunately, I could never really find a good place to display it, because most outlets are near the floor or behind couches and not really intended for display. And I didn’t want it knocked about, so it needed something special.
I also decided that it’d have pride of place with my other lamps, so it needed to fit the style of those.
The first step was to sketch what I was thinking about, both so I had a goal and I could figure out the parts list. Here is my sketchbook entry:
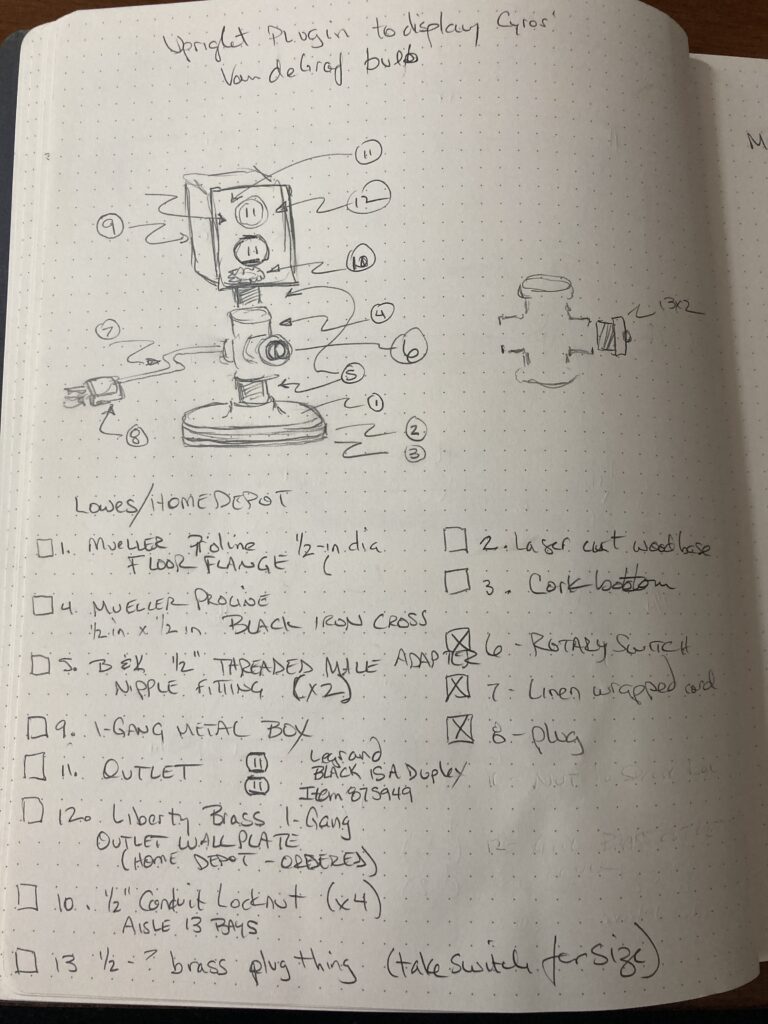
After a trip to my local big box hardware store and ordering the outlet faceplate online, I built my mobile outlet for display.
Dice Rolling Trays
This project had been in progress for far too long. I had cut the pieces for the sides some time ago but then wasn’t sure I could finish them the way I wanted to, so it languished. But, pandemic and retirement aligned to remove my excuses, so I decided to finish them. I’ve taken to building three of something if I want one good one, recognizing that most of this is new to me and I will make mistakes and there will be … losses along the way.
In the end, I think I had enough sides to make half a dozen and I ended up with four. I failed to make the version that had a slot built in for the dice (a more rectangular shape with a separator) when I screwed up on a critical step and had to move on. But, four in a sufficiently good state was good enough.
I also experimented on two of them by using the Glowforge to engrave patterns on the sides. Those came out better than I’d hoped. Additionally, I used the Glowforge to engrave a pattern on the leather on the bottom of some of them.
In the picture below, there is one that’s white oak and teal leather. My wife doesn’t play Role Playing Games, but she asked me for a Bunco rolling box, so now she has a box for both!


Dice Box/Mini Rolling Tray
One takeaway from this year is that maybe having a clear list of the things to be made will help me plan better. In this case, this entire gift was the result of a last minute inspiration.
I was tuning the engraving for the Baal symbol for the bottom of my son’s dice rolling box and I ended up with a really clean but smaller version of the final product:

I was thinking that it was such a waste to have this nice tester and not have anything to use it on. That’s when I came up with the idea of the dice holder/mini rolling box. The notion was a box to hold a set of dice, but the top could server as a mini rolling box with the leather in the bottom/top. Additionally, I decided, it’d be really nice if magnets could hold it shut.
Back to the sketch book!
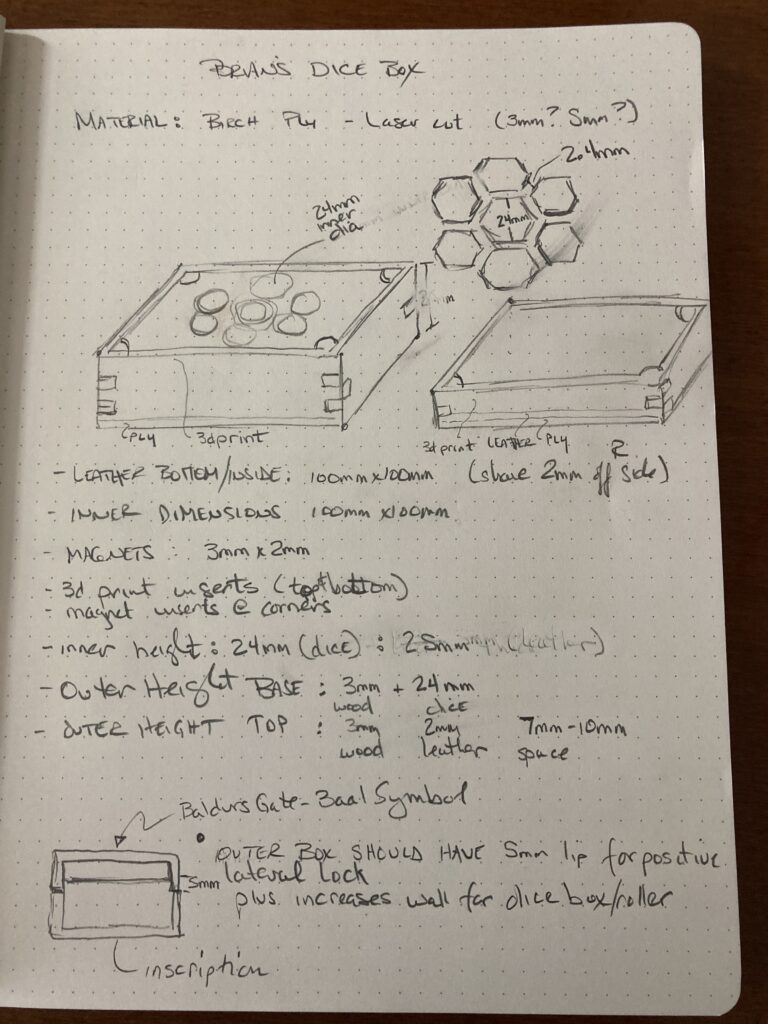
I knew upfront that there would be laser cutting and engraving (all laid out in Affinity Designer), as well as 3d Printing for the insert as well as laser etching for the leather inserts. Oh, and magnets. But, that’s a lot of pieces that needed to come together pretty quickly.
Fast forward through eight prototype versions of the 3d Printed insert and I finally had something that would fit in the wooden box correctly, had small insert holes for the magnets and had everything else correct in terms of dimensions, height, etc. For this step I used TinkerCAD. Yes, I need to learn Fusion360. It’s on my list. I just haven’t had time.


I had some interesting translucent printing material, so a couple of them got that. One was just basic black. I could only print two of these (top and bottom) per day. So, iterating through eight versions before getting it right was … time consuming.
Then, some laser cutting and engraving, some leather cutting and engraving, assembly, gluing and finishing and I had some boxes!


Sofa Table
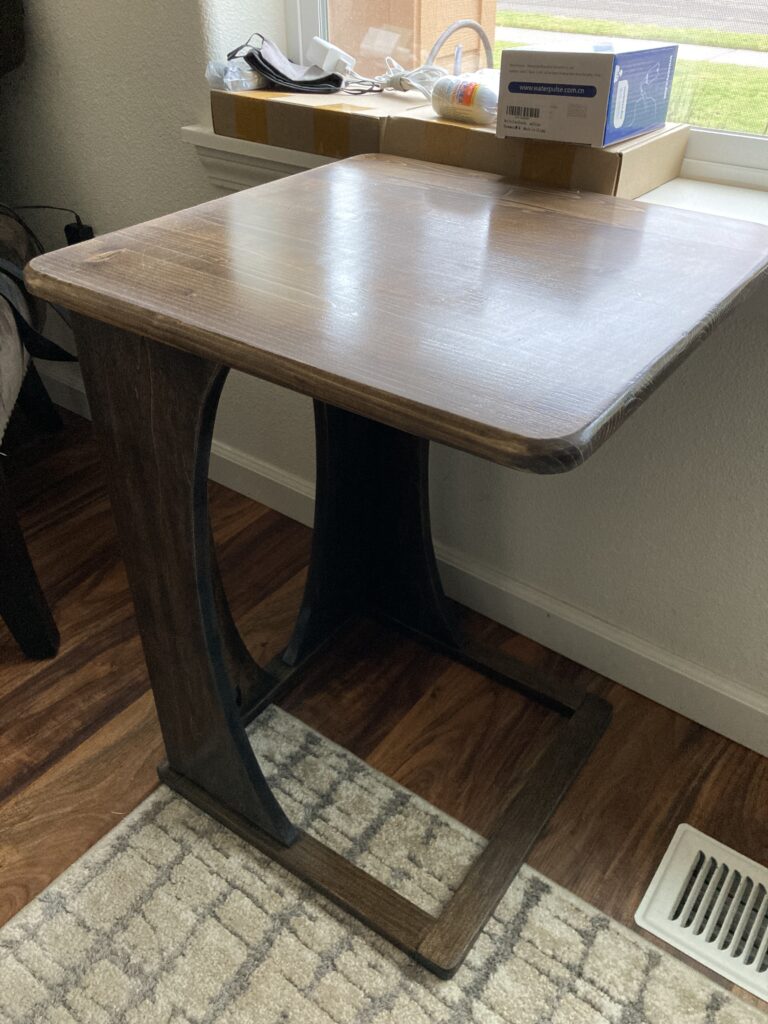
My daughter made the only direct request and it actually fit into the time I had. Just barely. She asked for a small sofa table could sit in front or to the side of her sofa to put a laptop or pad on.
She and I kicked designs around and eventually settled on one that I thought I could build. I found it on YouTube on Steve Ramsey – Woodworking for Mere Mortals. Specifically, she and I liked the look of this project. I like Steve’s channel because he’s accessible, entertaining and makes you feel like you can build things. Plus, he’s creative and shares projects and plans.
His version had different dimensions, so I had to adjust to what Laurel wanted, which was an 18″ square top and 24.5″ high. So, off to the sketchbook to figure out how much wood I would need:
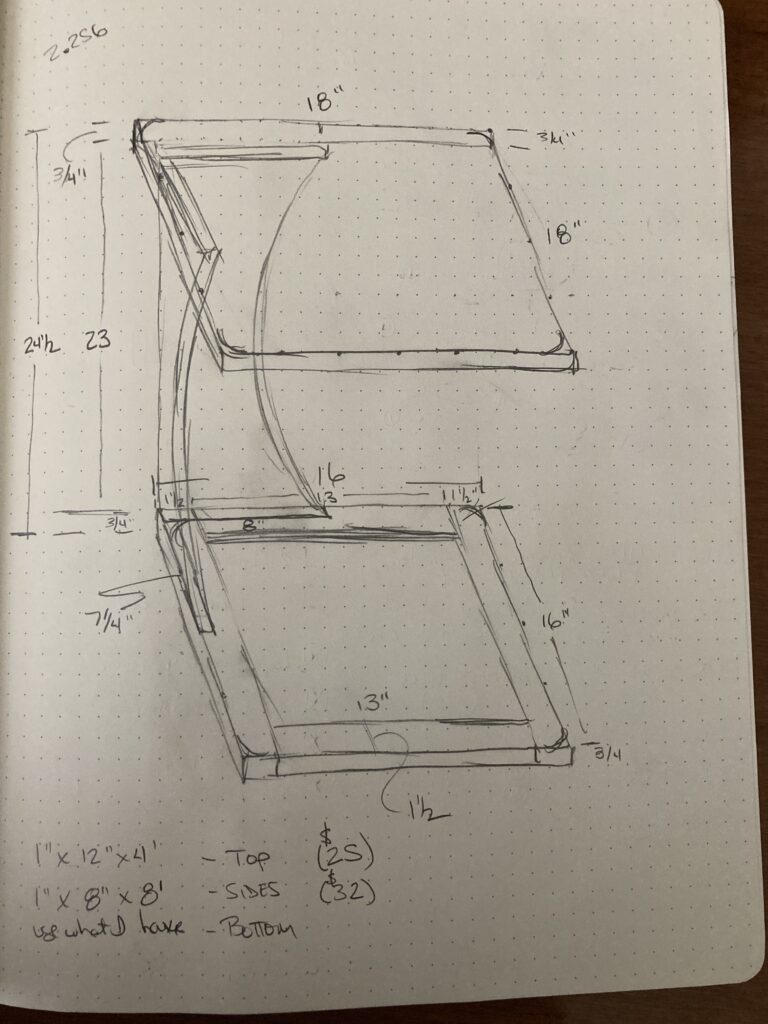
In the end, I used a project board from my local big box hardware store instead of gluing up my own top because I thought it’d save time. I was correct, it was nice to not have to sweat that detail. The rest was made with relatively inexpensive and light poplar.
I managed to sneak in a few outside days where I could bring out my table saw and some other wood working tools before the weather went completely bad. I can think of a couple things I did that were wrong, but I was able to recover without obvious compromise.
After lots (and lots!) of sanding and stressing because I was using pocket screws for the first time, I got it assembled and stained. In the end, I took most of this stain back off because I didn’t like that I’d missed a couple spots where glue didn’t get removed and took the stain poorly. And I had to do that protective coat twice because I didn’t like how that turned out the first time. But, I got there in the end and delivered it before Christmas!
Basket Sides
This project wasn’t even mine. I was just really happy to be asked to help.
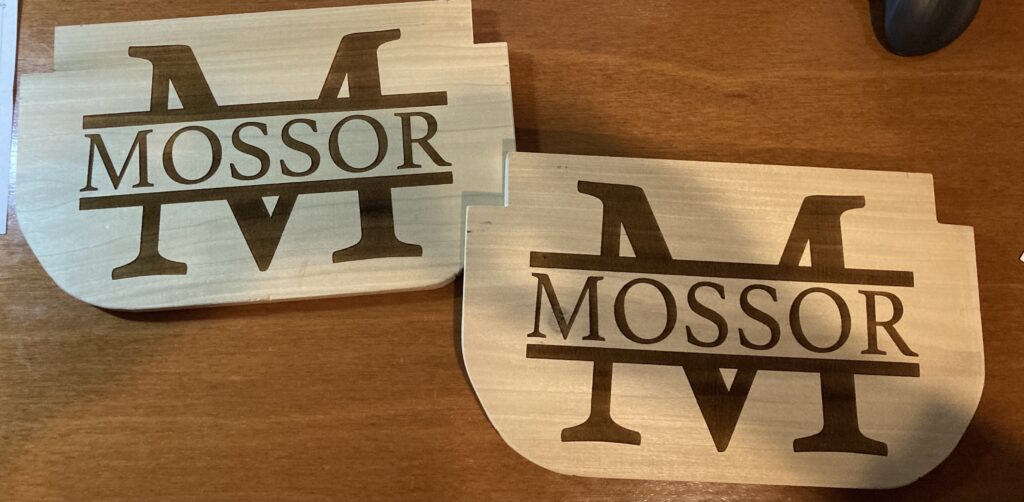
My daughter in law had a project in mind that would benefit from having a design engraved on the ends.
We kicked around a design and came up with this:

Then she sent me the end pieces and I engraved them:
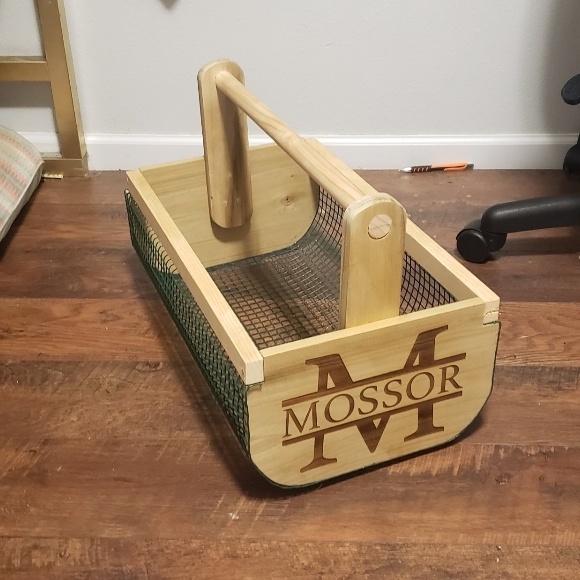
I sent them back and she assembled this awesome basket for collecting veggies with a wire bottom to let all the water and stuff fall out. She did a really good job on it!
Sign
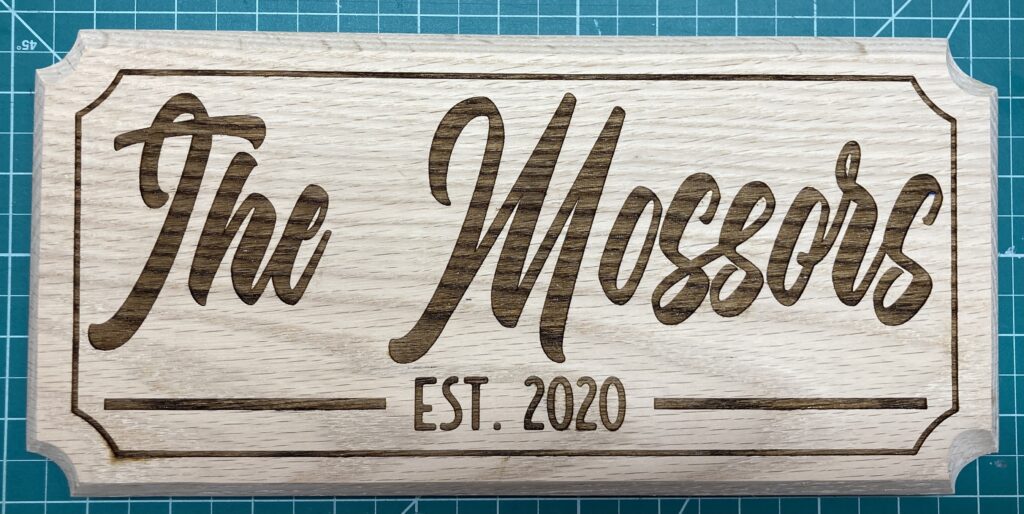
The last one was really a last minute notion. I wanted to make one of those signs for my newly married brother with the family name and “Est. 2020” on it.
In my head, it’d be fast to cut the wood on the table saw, the corners using the band saw and the router on the corners, then engrave the sign and finish it with something. And, basically, that’s what I did. It’s not perfect. I need to practice more with my router. In fact, I messed up the keyhole to hang it on the back, but ran out of time to do another one and still get it there by Christmas. I figure that’s on the back and no one will see it once it’s hung.
I really enjoyed this Christmas season and working on all these projects helped take my mind off the dumpster fire of a year in the last few months of the year.
I got all the presents off and we did a Zoom Christmas unwrapping and it was fun to see my projects in the hands of my family and their appreciation of what I’d made. I’m very fortunate to have the opportunity and the means to work on projects like these. I hope the coming year provides you a similar sense of happiness and satisfaction in whatever way is most meaningful to you. Merry Christmas!



0 Comments