Some time ago, roughly four months ago, I was watching a show called The Librarians. I enjoy it because it’s silly and escapist and it’s filmed in Portland. In the past they have used many familiar landmarks including the sub at OMSI (and OMSI) and their secret lair is under the base of the St. Johns Bridge. So, it’s always fun to watch and spot landmarks. Give it a shot if you’re in the mood.
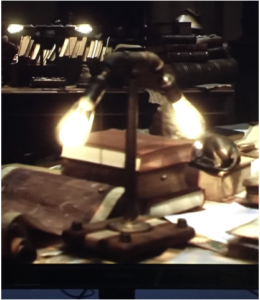
As I was watching one episode, I spotted a lamp which I thought was kind of cool. I have noticed the show likes to fill the background with lots of stuff which is kind of Steampunk-ish or maybe Retro or Urban or something which I’m sure has a name that I don’t know. In any case, the lamp caught my eye. Enough so that I took a few screenshots of the television.
Here’s the best:
I liked the wood, I liked that I could identify that most of it was built from industrial pipe, I liked the bulbs, which I would later identify as Edison Bulbs.
Later, in another scene, I spotted a single bulb version which was similar, but had a glass shade.
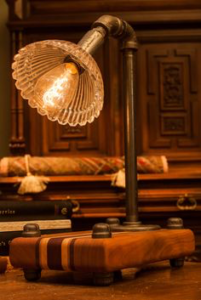
After that I went to Google and started searching for similar lamps and finally ran across this one off a link on Pinterest. I won’t link to it since the Pinterest link dead ends and the domain is for sale, but here is the lamp which the ad copy says was “heavily featured on The Librarians”:
So, again, nice wood, rustic pipe, cool bulb. I wasn’t as jazzed about the glass shade, but I liked the concept.
That sent me down a rabbit hole of Googling, but mostly around how to build DIY lamps using pipe, looking at fixtures, bulbs, lamp shades or cages.
I thought I could figure out how to do everything except I had no clue how to build the base. I haven’t done any woodworking since woodshop in junior high (shout out to Mr. Janke who had lost a few fingers to things with blades, was a bad-ass with the industrial vacuum and taught us to taunt folks from Sweden with “Ten Thousand Swedes, running through the weeds, chased by one Norwegian!”).
Fortunately, I know my own bad-ass woodworker and he has all his fingers and is a friend, so I was able to ask him some questions and he was very, very helpful in pointing me in the right direction and steering me away from a couple nasty potholes. Thank you Larry!
The first problem I had was how was the base constructed? To those with more knowledge than me, it is probably obvious, but I didn’t know. Larry told me that this is done by gluing the right sequence of strips of wood together after you cut them on a table saw. Easy Peasy! Yeah, right.
Well, I followed up with, what kind of crazy rare wood is that likely to be? He again put me on the right path: “Those look like fairly common species that aren’t terribly rare and expensive. I’d say mostly walnut, maple, and a couple of others.”
In the end, after a trip to the wood store, examining the options and spending an hour talking with the very helpful wood salesmen, I settled on the pretty common White Oak for the light, Black Walnut for the dark and Cherry for the warm brown color.
I will not take you down the odyssey that that process became but I learned how to use my table saw (correctly), I learned how to plane (and how not to plane) wood. I learned that it’s far better to do it correctly the first time than try and sand out the mistakes later. I followed the woodworkers path of turning larger pieces of wood into smaller pieces of wood with the application of power tools and elbow grease and the production of copious amount of sawdust. Like “fill up my wet/dry vac” volumes of sawdust.
Then came the lengthy process of gluing, which was terrifying only because it seemed like it would be hard to undo if I did it wrong. Then there was routing to round over the edges for the smooth look in the image above. Then came the sanding. And more sanding. And then there was some sanding in there somewhere.
Eventually I had a base and it was time to drill the holes for the legs and the hole the electrical cord would go through. I managed to scratch my wood (stupid mistake) which necessitated more sanding to fix my error.
We had some really awesome winter weather this year in Portland, so that killed nearly a month of time I might have worked in my shed, but I didn’t want to because it was really, really cold and breathing in a shed where you are producing sawdust without sufficient ventilation is really unpleasant.
Finally, about a month ago, the weather turned sufficiently and I put in the time to get the bases close to done. Then it was time to turn them from a dry looking piece of wood into something nice and once again Larry steered me in the right direction: “For projects like that I prefer a rub on finish. I finished one of my first woodworking projects with Watco Tung Oil. Like boiled linseed oil but penetrates better and leaves a warmer tone. Boiled linseed oil is ok, but not what I think of as a satisfying finish.” It was his next piece of advice when we talked about how many layers to apply that cemented the realization that woodworkers are nuts: “Just wipe on, let sit for a half hour, wipe off – then wait a day. They say a coat an hour for a day, a coat a day for a week, a coat a week for a month, and a coat a month for a year, and yearly thereafter.” Yeah, nuts. I gave up after a dozen coats. They looked nice. I was happy with them.
In parallel with this i acquired the pipe fittings. I figured (correctly) that they were ½” pipe and fittings. I did some quick figuring for parts and made a trip to my local big box hardware store and bought the basic pipe bits. Unfortunately, they’re pipes. From a hardware store. So, they were greasy and kind of gross and I wouldn’t want them in my house, so I had to do some cleaning.
As I was putting together parts and looking at what I wanted to do, I started to notice that a lot of Steampunk uses brass or copper. And some of the shades and lamps that I found were kind of cool looking with brass accents. So, I decided that instead of strictly industrial, I was going to class mine up a bit and I would use brass bits (technically termed ‘nipples’) to connect the pipe parts. And, I would paint my pipe black so I’d have the wood and black pipes and brass accents and old-timey bulbs.
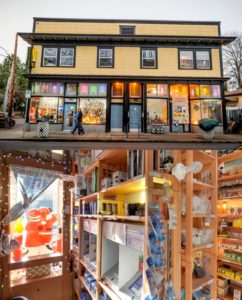
I wanted to find some nice sockets but I didn’t want the standard pull cords or knobs to turn them on/off because I planned on using a switch on the cord. That resulted in me exploring a very cool store my wife and I happened upon one weekend in Portland called Sunlan Lighting. They source any number of cool bulbs, sockets, wiring, lights, lamps, hardware and various bits and bobs. It’s a very cool and very Portland store and everyone in there was very nice and very helpful.
Here I found several difficult to find things:
- Exactly the right lamp base I wanted – though it had a ⅛” threaded base
- ⅛” threaded bit
- ¼” threaded bit
- ⅛” to ¼” coupler
This combination allowed me to thread the bulb base directly into the pipe fitting which ended with a ½” to ¼” reducer, which was a big deal and solved several problems!
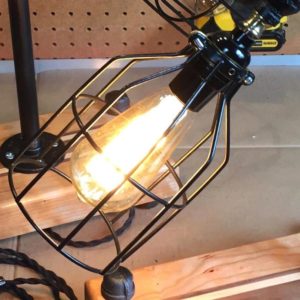
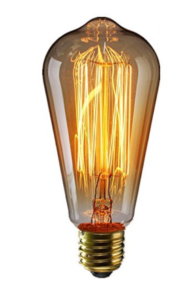
Finally, after searching through options, I settled on these “Vintage Edison Bulbs 60W Squirrel Cage Filament Incandescent Antique Light Bulbs”:
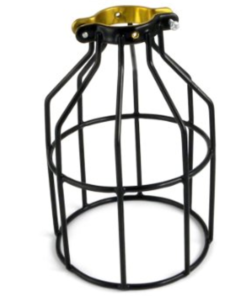
And these covers, “Metal Lamp Guard, Industrial Wire Iron Bird Cage”, mostly because I liked the black and brass:
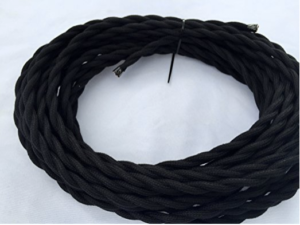
I found some cool cord, “Black Twisted Vintage Cotton Cloth Covered Cord”:
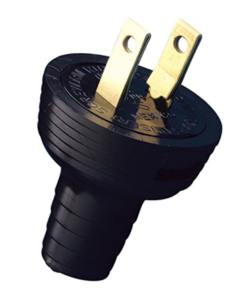
and some classic looking plugs:
And, finally, some inline rotary dimming switches.
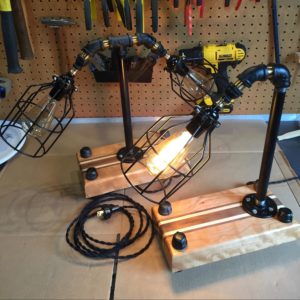
After months since I’d started with “Hey, those are cool, I wonder if I could make something like that”, I was able to start assembling the results this last weekend to see how they would look.
Here are the results.
Now, they’re not 100% done. I still need to paint the silver screws attaching the Black Iron Floor Flange Fitting to the lamp base.
I’m trying to decide if they’re too short relative to the base, but I think I’m good with that. Additionally, I wonder if they need some aging to make them look less like something that was completed last weekend, but those are details. Oh, and the caps that will sit on a table need something to protect whatever they will sit on or they will scrape the heck out of whatever surface that will be. And, frankly, these are likely just going to end up in my office, anyway. I won’t impose these on the rest of the house.
Looking back at the images that started me down this path roughly four months ago, my result definitely turned in to my own thing versus recreating an existing prop, but slavishly copying an existing thing wasn’t my goal (this time).
I learned a bucket load about woodworking and the bases certainly wouldn’t have turned out as nice as they did without the help of my friend Larry. Having said that, I could point out half a dozen mistakes in the base that will likely only ever irritate me, but I also know that I would probably only have half as many of them if I ever do something like this again.
If I apply any reasonable value on my time, then these are ridiculously expensive, one-of-a-kind lamps, so I have once again failed to stumble on some money-making second career, but that was truly never my goal. I simply wanted to make something cool based on something else cool that I saw one day while watching television. I’m happy with the results, so I’ll call that a success!
Here are some links to pages I found that were helpful or gave me inspiration
| How About Orange : How to Make an Industrial Floor Lamp | http://howaboutorange.blogspot.com/2014/04/how-to-make-industrial-pipe-floor-lamp.html |
| Home Depot Blog: DIY Industribal Lamp: Cool Desk Lamp Made From Pipe | http://blog.homedepot.com/diy-industrial-lamp-cool-desk-lamp-made-from-pipe/ |
| Steampunk Lamp: Dan is building cool things and blogging out what he did and how he’s doing it. Excellent read and answered a question from me, which was appreciated. | http://www.dplivingston.com/steampunk/steampunk-lamp-1 |


0 Comments