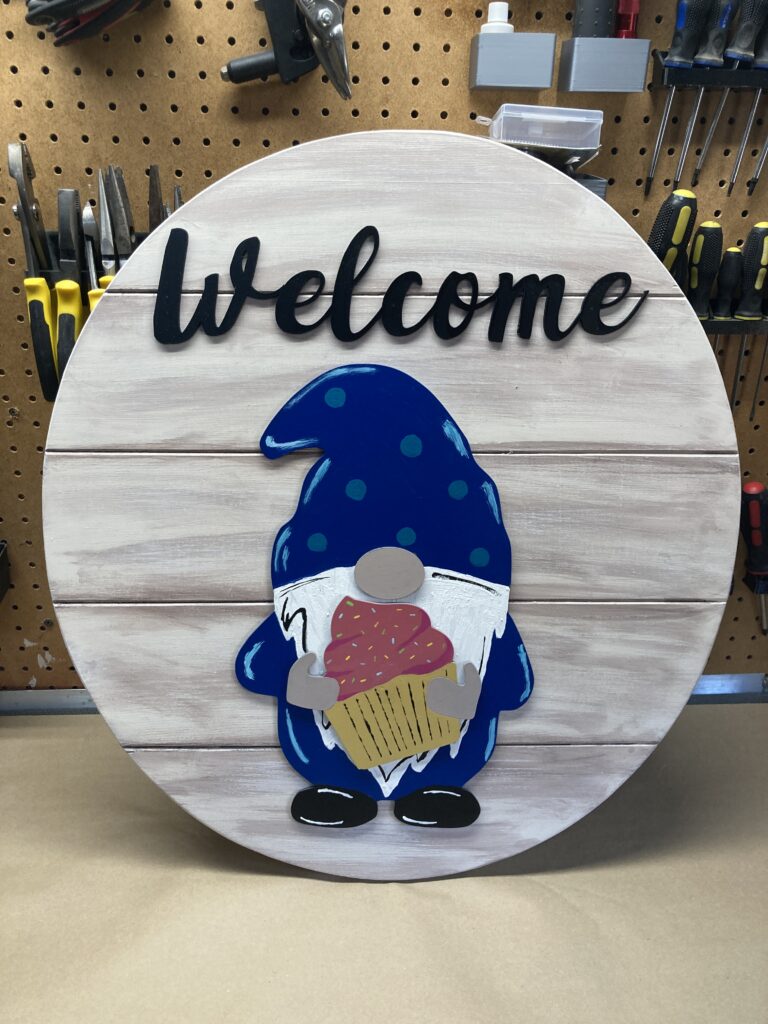
Christina came to me and showed me a Welcome sign she liked and asked if I could make her one. I looked at it and thought: “Yup! I can do that!” So, I did!
This was one of those awesome moments as a Maker where you look at a project and you know how all the pieces will go together and you know how to get what you need out of all the right tools. So, it just becomes execution and not constant learning and/or problem solving. That’s a nice feeling.
The first step was the backer board. I knew I’d be cutting down boards and gluing them, something which was new to me – at least when I’d tried it in the past, it hadn’t gone so well. This time I knew the goal was an oval about 24″ tall by about 22″ wide. I knew the boards would have a gentle bevel between them. I ripped the boards to the right width and sanded a gentle bevel on the edges. Next, I glued the boards, using clamps to hold the edges together and additional clamps which held four pieces of wood at the outside edges to keep the pieces flat/level while the wood dried.
Cutting the oval was harder than it should have been. There are lots of ways to make an oval on a piece of wood. The classic involves a couple of nails and a piece of string and a pencil. I’ve tried this in the past and found it to be error-prone. I opted to simply print a quarter oval using Affinity Designer and flip it for each quarter. That worked great for me and I knew it was the right shape. Then I simply cut the shape with a jigsaw and some sanding gave me a nice oval board with beveled edges between the boards, just like I wanted.
Then I fired up Affinity Designer, my go-to design and layout tool, especially when I know I’m going to end up cutting shapes with the Glowforge. I created shapes for the sign, the central dwarf (and nose), and then set about creating a set of images for him to hold. Things like a cupcake, a turkey, a flower, a football, etc. Christina and I settled on 13 items he could be holding based on occasion or season.
The key to this was going to be magnets! Magnets are always a good idea. With a good strong magnet around the dwarf’s bellybutton, if I mounted another magnet in each piece, you could just slide the old shape off and snap on the new shape in moments. Easy Peasy. I had some magnets, but I wanted some reasonably strong magnets. I had a few from a prior project, so I bought more of these. They’re a half inches diameter and an eighth of an inch thick with a holding power of more than six pounds! Yes, more than I required, but it meant the pieces were not going to become separated without intention!
While I was waiting for the magnets, I cut the shapes, including a hole on the dwarf and on each piece to hold the magnets once they arrived. Once the magnets came, I used CA glue (super glue) to fix them in place. Then I used spackle filler over top of the magnet to cover the hole containing the magnet. After letting that dry overnight, a quick bit of sanding left them flush and ready for primer paint.
Once that was dried, I could start painting. This is the fun part and the time consuming part. Painting each piece (for the first time, as a one-off) is time consuming. This is where if someone were selling this product, you reduce the cost of the merchandise because you can paint a dozen pumpkins or hearts or whatever rather than changing paints and design after each piece.
At this point I sought sign-off with Christina and she had some good feedback on a couple of pieces. I addressed those and next it was off to cover everything with a clear acrylic to protect them from weather. Last, I added hooks and wire on the back to hang and I was ready to call it done!
Not the hardest project, nor the longest. I could have knocked this out in a few days if I had all the parts on hand. I also could have saved some money by making the backer board from cheaper pine and using cheaper magnets. And now that I have the designs in Affinity Designer, that (time) investment doesn’t have to be made again.
The result is bright and fun and is eye catching. It was a fun project and I’m glad Christina asked me if I could do it, I don’t get a ton of chances to make things for her.
Here are some pics of the completed project, with and without the additional pieces and the final product hanging outside our home.


0 Comments