In The Beginning…
I recently decided I wanted to make my own LED sign. But, that only make sense with some background.
During my senior year of college, I was placed on a senior project team. We worked with a mentor to complete a project in our final semester. Pretty standard stuff. Our project involved working with a mentor from a local company, American Sign and Indicator.
ASI was as close to a tech company as existed in Spokane, Washington, where I was going to school. The one exception to this was probably a hardware company called Keytronics, which made keyboards and mice and related peripheral hardware.
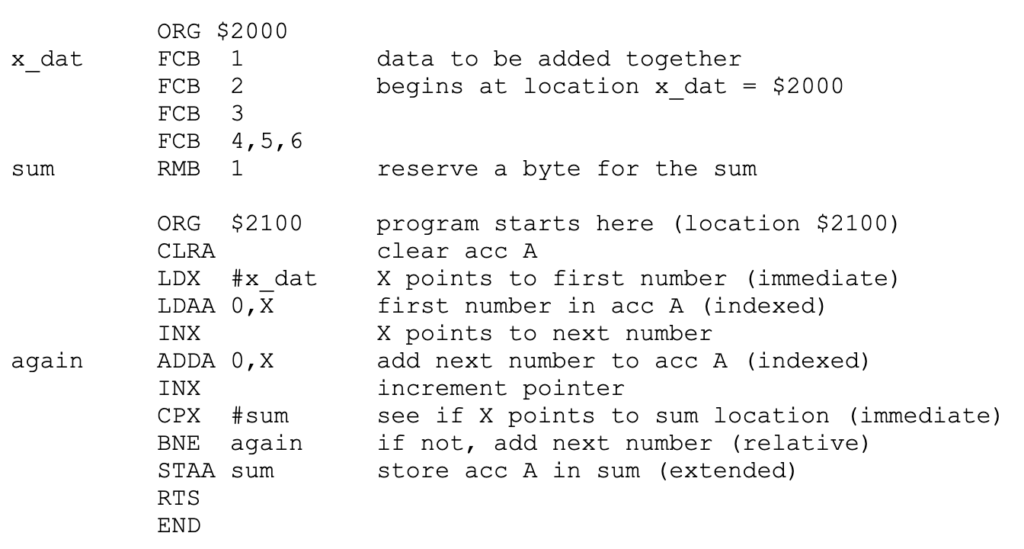
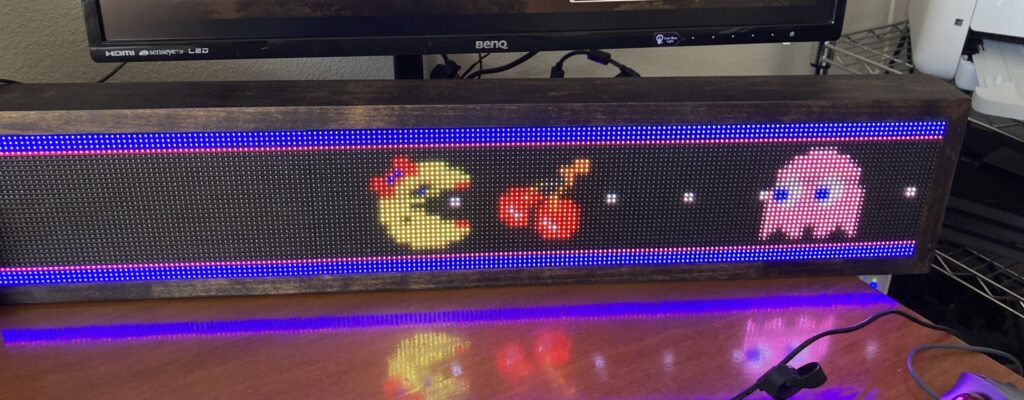
Our project was to write software to drive a sign from ASI. It wasn’t as large as the image above. Ours was something like 3-4′ wide and maybe 9″ tall. It was made up of a matrix of bulbs that could be turned on or off to make the image that was required, all driven by an 8-bit microprocessor called the Motorola 68HC11.
Programming was done in machine language, something much closer to the hardware than a language like C. This was back in the days where C was just taking off and leaving Pascal and FORTRAN in the dust. This, was 1988.

I was one of two project Leads on this project and by the end of the project it was really just me and the other lead who did most of the work. Although we broke up pieces of the project amongst the team members, this was our final semester before graduation and senioritis was setting in and over the semester folks just checked out. Except for we two Leads.
The bulk of the work we did was to code different transitions from one message to another. Imagine the basic transition might just be to turn off all the bulbs, then put in a message and turn on just the bulbs that would render that message. Then you’d do it for the next message and the next. Fine, but boring.
Instead, what we did was write code to provide a bunch of other transitions. The basic ones would be things like slide in from the top/bottom/right/left. Maybe we’d slide out the old message as well. After we got the basics, we did more interesting things like wipes and making the contents of the message flip and then flip again to the next message.
I found all of this just an excellent project. Not only because I and the other lead got to do most of the work, but because this was my jam. I knew by this point that this is what I wanted to do as a career. Also, it’s fair to note, I was not a trained software engineer. This was not a thing back then. In fact, I was getting a Bachelor’s Degree in Electrical Engineering, so I was getting pretty far away from my degree, but I still knew I was on to the thing that was going to change my life. And, in retrospect, it did! That project gave me the conviction and confidence to pursue a career in a field that was effectively in its infancy with a degree that only peripherally related to what I wanted to do!
Remember When
Fast forward a number of years to when I was working for a large software company and in a hallway, attached to the ceiling, someone had a sign that was scrolling through what used to be called ‘fortunes’, basically quotes and aphorisms that could be generated randomly by accessing a large database of the things. I asked some questions and it turned out someone had built this from scratch. At that time, the panels to display the content were still relatively expensive, but I filed it away as a cool reminder of my own project from years ago and thought I might someday build my own.
Fast forward again to about six months ago and I found some cheap panels on Amazon that were LED, multicolor and were 64 pixels wide and 32 tall and the actual panels were 256mm by 128mm. If I strung three of these together, I’d get 192 pixels by 32 pixels and the panels would be 30.2″ by 5.0″. Add in a wooden box to hold the panels and the entire thing would be about 32″ by 6.5″. The plan was to drive this with a Raspberry Pi. To drive the panels, I needed an electronic interface and I found a nice one at Adafruit: Adafruit RGB Matrix HAT + RTC for Raspberry Pi – Mini Kit. At this point, I had the panels, the Raspberry Pi, the HAT which provided the interface to the panels. Next was a box.
The Build
The box was a simple build and stain. The goal was for the frame to be close to the panels in tone and a close fit. I was pretty happy with the results:


This project pulled together a variety of things from basic woodworking, to the laser cutter (the MDF) to the 3d printer (the Raspberry Pi case) to some basic electronics (wiring and power! – I hate power, I blew up a lab station in college. Like, actual smoke. It was not good.) And this was before any of the software…
This project wouldn’t exist if it weren’t for two projects which were created and made available to anyone to build from. They are:
With the work of these folks, the very basic bones of the project came together pretty quickly. I had some hiccups in getting the sign to display properly, but reading the project docs and some fiddling got it working the way I wanted.
The Open Sign project provides a number of transitions out of the box and was a great intro on how to use the basic Python library on which this project depends. And my project would use these, but also wanted to do a number of things on top of that. I would need to access some information from the Web, have local fortunes like the sign I saw years back, would use some new transitions and the whole thing should be driven by data that would tell it what the messages were, the transitions and would include some other kinds of displays. Additionally, I wanted to include basic animations.
I decided it should be able to display a simple Ms Pac-Man transition screen and came up with this.

Some other examples:


- A simple message on a custom background
- Displaying a fortune
- Local weather
- 3-day forcast
I enjoyed developing the weather piece. I found a solid (and free) weather API that would give me weather info and I located custom icons to display the weather data. For the API, I found OpenWeather and for the icons, I found some CC4.0 icons provided by Dovora. From there it was just learning how to parse the data and then display it how I wanted.
What’s Next?
This project is not done. Frankly, this project is still in its infancy and I will need to spend more time on the software. There are a number of things I want to do with this, but some I don’t know how to do yet and some simply require time.
Eventually the content the sign will display should stored somewhere that the sign accesses so the content can vary. I imagine a server running somewhere that has a database. This server will have a front-end that allows the sign content to be modified and input, as well as allowing the control of timing (delay) and transitions. Right now I have to connect a keyboard and mouse to the sign’s Raspberry Pi because it’s easier to program right now in the GUI. The sign is hardwired to run a program and can’t be modified without reprogramming. So, I have a chunk of work to do in getting the software working, but by writing this up, I’m giving myself permission to call this stage complete for now.
It’s worth noting that the sign that I did the original project on almost 30 years ago was worth around $4000, so we were very careful not to break it. This project cost about $150 in hardware and can do things that sign only dreamt of. Color LEDs, fast transitions, an actual programming language and a GUI to develop in. We certainly have come a long way from my days of programming all this in 68HC11 assembly language! But, how fun that I can recreate this project and have my own sign to display whatever I want, completely designed and built by me (and the generosity of some open source projects!)


1 Comment
Diane Hardman · May 18, 2021 at 3:15 pm
This is so cool! Your college experience is similar to mine, though I graduated from UCSB in 1983 and was one of the very few new EE hires at HP who knew C programming.
I’m sharing your blog post with my son who loves to tinker as well. Thanks!